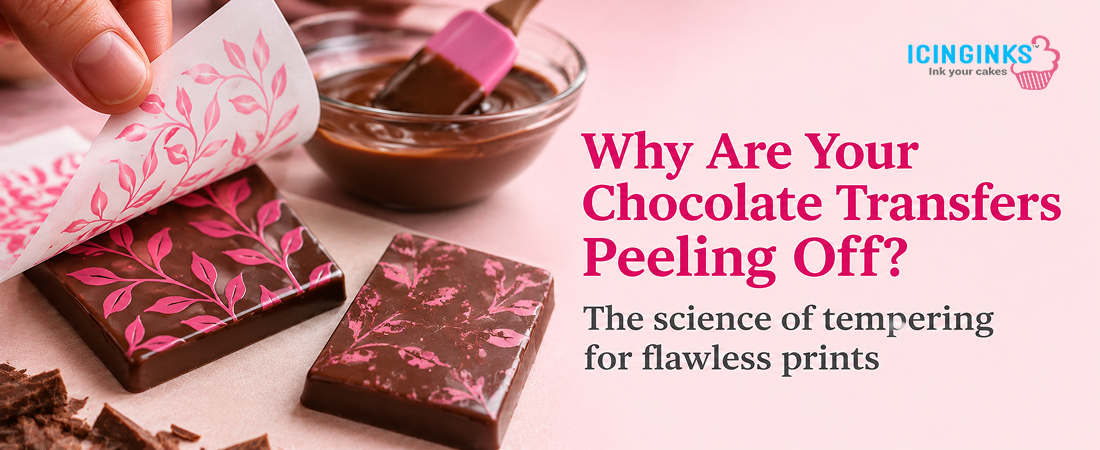
Chocolate decorations can look beautiful on the transfer sheet but turn out uneven, streaky, or incomplete once you peel the backing away. Sometimes, parts of the design transfer perfectly while other areas remain stuck to the sheet. In other cases, the print smears, fades, or breaks apart during removal.
If you have experienced this, the problem may not be the printed design. It could be the way your chocolate is tempered, spread, cooled, or handled.
The transfer process depends on how cocoa butter behaves as chocolate cools and solidifies. When the temperature is wrong or the chocolate does not set evenly, the printed design may not release properly.
Understanding this process can help you get cleaner results from edible transfer sheets for chocolate, reduce wasted materials, and create professional-looking decorations for cakes, cookies, bonbons, and other chocolate treats.
In this guide, we explain why chocolate transfers peel off patchy, how tempering affects the final print, and what you can do to achieve a smooth, consistent transfer.
Why do chocolate transfer sheets peel off patchy?
Chocolate transfer sheets work by transferring a printed design onto chocolate as it cools and sets. The edible design is carried by a cocoa butter-based layer on the sheet. When chocolate comes into contact with this layer, the design transfers to its surface during the setting process.
For a clean result, the chocolate needs to be at the right working temperature and properly tempered. It also needs enough time to crystallize before you remove the backing.
If any part of this process goes wrong, the transfer may become uneven.
Here are the most common reasons for patchy results:
The chocolate is not properly tempered
Tempering controls how cocoa butter crystals form inside chocolate. Properly tempered chocolate develops a stable crystal structure that helps it set with a smooth finish.
When chocolate is under-tempered, it may remain soft for too long, lack a consistent structure, or fail to contract properly as it cools. This can make it harder for the design to release evenly from the sheet.
The chocolate is too hot when applied
Chocolate that is too hot can affect the cocoa butter layer carrying the printed design. Excessive heat may cause the design to smear, blur, or transfer unevenly.
Always bring your chocolate down to its recommended working temperature before applying it to the sheet.
The chocolate layer is uneven
If one section of chocolate is thicker than another, different areas may cool and set at different rates. This can lead to inconsistent release when you remove the backing.
Use a clean spatula to spread the chocolate evenly across the transfer surface.
The backing is removed too early
A transfer needs time to set. If you peel the backing away while the chocolate is still soft, parts of the design may remain attached to the sheet.
Wait until the chocolate has fully set before removing the backing.
The science behind chocolate tempering and transfer release
To understand why transfers sometimes fail, it helps to understand what happens inside chocolate as it cools.
Cocoa butter can form several different crystal structures. These structures do not all behave in the same way. Some are less stable and melt more easily, while others provide the firmness, shine, and snap associated with properly tempered chocolate.
Form V crystals are particularly important in traditional chocolate tempering. They help create a stable chocolate structure with a smooth finish and good contraction during setting.
Research on cocoa butter crystallization also shows that chocolate quality depends on more than reaching a single temperature. Crystal formation, distribution, and the overall structure of the chocolate matter too.
How cocoa butter crystals affect the transfer
The printed design on cocoa butter-based chocolate transfer sheets needs to come into contact with chocolate so it can transfer as the chocolate sets.
When the chocolate is properly tempered, its cocoa butter crystallizes into a more stable structure. As it cools, the chocolate firms up and can release from the backing more cleanly.
When tempering is inconsistent, the chocolate may not set uniformly. Some areas may release the design while others remain soft or fail to pick it up completely.
This is one reason why a transfer can look perfect in one section and patchy in another.
Why stable crystallization matters
Stable crystallization affects several qualities of finished chocolate:
- Gloss: Properly tempered chocolate develops a smoother, more attractive surface.
- Snap: A stable crystal structure helps chocolate break cleanly.
- Setting: Chocolate can firm up more consistently when properly tempered.
- Release: A stable, well-set chocolate surface is better suited to clean transfer removal.
- Appearance: Proper tempering helps reduce common surface defects, including dullness and uneven finishes.
Tempering is therefore not only about making chocolate look shiny. It also plays an important role in getting consistent results from printed transfer designs.
Recommended chocolate temperatures for transfer sheets
The correct working temperature depends on the type of chocolate you are using. Dark, milk, and white chocolate have different compositions, so they do not all behave identically during tempering.
Icinginks recommends the following working temperatures for chocolate transfer applications:
| Chocolate type | Recommended working temperature |
| Dark chocolate | 31–32°C (88–90°F) |
| Milk chocolate | 31°C (88°F) |
| White chocolate | 29°C (84°F) |
These are working-temperature recommendations for the transfer process. The temperatures used during the complete tempering cycle will be different.
Always check the manufacturer's instructions for your particular chocolate. Chocolate formulations can vary, and the ideal temperature may change depending on the ingredients.
Why temperature control is important
If your chocolate is too warm, it may affect the printed cocoa butter layer and cause the design to blur or smear.
If it is too cool, it may become difficult to spread evenly. It can also begin setting before you have covered the entire transfer surface.
Use a reliable digital thermometer and monitor the chocolate while working. Avoid relying only on touch or appearance to judge its temperature.
How to use chocolate transfer sheets for a clean, even print
The application process is just as important as tempering. Even properly tempered chocolate can produce an inconsistent result if the sheet is positioned incorrectly or the chocolate is spread unevenly.
Follow these steps to improve your results.
Step 1: Prepare the transfer sheet
Place your transfer sheet on a clean, flat, dry surface. Make sure the printed side is positioned correctly for the application method you are using.
For mold applications, follow the sheet and mold instructions to ensure the design faces the chocolate.
Avoid touching the edible printed surface unnecessarily.
Step 2: Temper your chocolate
Melt and temper your chocolate according to its type. Use a thermometer to check the temperature before applying it to the transfer sheet.
The chocolate should be fluid enough to spread smoothly but not so hot that it affects the printed layer.
Step 3: Spread the chocolate evenly
Pour or spread the tempered chocolate over the transfer sheet, depending on the application method.
Use a clean spatula to distribute it evenly. Pay attention to the edges and corners, where thin or uncovered areas can create incomplete transfers.
Avoid excessive pressure or repeated spreading after the chocolate starts to set.
Step 4: Allow the chocolate to set
Place the chocolate in a cool, dry environment and allow it to set properly.
Do not rush this stage. The chocolate needs enough time to crystallize and become firm before you remove the backing.
Avoid unnecessary temperature changes while the chocolate is setting.
Step 5: Peel away the backing carefully
Once the chocolate has fully set, gently remove the backing from the transfer.
Peel it slowly and steadily rather than pulling sharply. The printed design should remain on the chocolate surface.
If parts of the design remain on the sheet, check the chocolate's temper, working temperature, and setting time before trying another batch.
Common chocolate transfer problems and how to fix them
Not every transfer problem has the same cause. Identifying what went wrong can help you make the right adjustment instead of wasting another sheet.
| Problem | Possible reason | What to do |
| Design transfers in patches | Uneven setting or poor tempering | Re-temper the chocolate and allow it to set completely |
| Design looks blurred | Chocolate was too hot | Check the working temperature before application |
| Design remains on the sheet | Chocolate did not set properly or was removed too early | Allow more setting time and check the temper |
| Chocolate surface looks dull | Incorrect or inconsistent tempering | Follow the correct tempering cycle |
| Print looks faded | Excessive heat or unsuitable chocolate color | Use the recommended working temperature and consider white chocolate |
| Chocolate breaks during removal | Chocolate may be too cold, too thin, or handled before it is ready | Allow it to set properly and handle it carefully |
What if only part of the design transfers?
When only some sections transfer, examine the chocolate layer before changing the printer or artwork.
Check whether the chocolate was spread evenly, whether the entire sheet made contact with the chocolate, and whether the chocolate had enough time to set.
If the same area repeatedly fails, inspect the transfer sheet for creases, damage, or contact problems.
What if the design looks faded on dark chocolate?
The color of the chocolate can affect how visible the printed design appears.
Icinginks recommends white chocolate for better print visibility. Dark chocolate can make some colors look dull, and certain shades may not show clearly.
If your design contains several colors or fine details, test it on a small piece of white chocolate before preparing a larger batch.
How to get better results from edible transfer sheets for chocolate
Good transfer results come from controlling several small details throughout the process. A few consistent habits can make a noticeable difference.
- Use properly tempered chocolate: Do not skip tempering or assume melted chocolate is ready to use.
- Check the working temperature: Use a thermometer rather than guessing.
- Spread chocolate evenly: Keep the layer consistent across the sheet.
- Allow sufficient drying time for printed sheets: Make sure the edible ink is completely dry before adding chocolate. Dark or heavily printed areas may need more time.
- Keep your work area dry: Moisture and condensation can affect chocolate's surface and appearance.
- Avoid premature peeling: Wait until the chocolate has fully set.
- Choose the right chocolate: White chocolate is a good option when color visibility is important.
- Store transfer sheets correctly: Keep unused sheets in an airtight bag in a cool, dry place, following the manufacturer's storage guidance.
If you are learning how to use chocolate transfer sheets, test the process with a small batch first. This lets you adjust the temperature, spreading technique, and setting time before working on a larger order.
Choosing the right chocolate transfer paper for your project
Not every transfer sheet is designed for the same application. Before purchasing, consider the type of chocolate decoration you want to create and the printing method you plan to use.
Edible transfer paper for chocolate can be used for different decorative applications, including chocolate bars, bonbons, molded chocolates, and cake decorations.
When comparing chocolate transfer paper, consider these points:
- Printing compatibility: Check which edible printer models are suitable for the sheet.
- Design requirements: Choose a product that supports the level of detail and color visibility you need.
- Chocolate type: Consider whether you will use dark, milk, or white chocolate.
- Application method: Make sure the sheet works with your molds or preferred chocolate decoration technique.
- Storage requirements: Follow the product's instructions to protect the edible coating and printed design.
You can also explore custom chocolate transfer sheets when you need branded designs, logos, or personalized artwork for a business or special event.
For more guidance, read our existing articles on how to print on chocolate transfer sheets, how to use chocolate transfer sheets, and how to choose the best chocolate transfer paper.
Create cleaner chocolate designs with Icinginks
At Icinginks, we offer edible printing solutions and chocolate transfer products designed to help bakers, chocolatiers, cake decorators, and businesses create personalized edible designs.
Our chocolate transfer sheets allow you to add printed designs to chocolates, molded treats, cakes, cookies, and other confectionery creations. Whether you are preparing branded chocolates, custom party favors, or decorative pieces for a special occasion, we help you bring your designs to edible surfaces.
We also provide guidance on printer compatibility, printing settings, working temperatures, and application methods so you can make better use of our edible printing products.
Explore our range of edible printing products and solutions at Icinginks. We are here to help you find the right products for your creative and business needs.
Frequently asked questions
1. Why are my chocolate transfer sheets peeling off patchy?
Patchy transfers can happen when chocolate is not properly tempered, is applied at the wrong temperature, or has not fully set before the backing is removed. Uneven chocolate coverage can also prevent consistent transfer release.
2. Do chocolate transfer sheets need tempered chocolate?
Yes. Properly tempered chocolate is recommended because it develops a more stable cocoa butter crystal structure and sets with a smoother finish. This helps the printed design transfer more consistently.
3. What temperature should chocolate be for transfer sheets?
Icinginks recommends approximately 31–32°C for dark chocolate, 31°C for milk chocolate, and 29°C for white chocolate during transfer application. Always check the product and chocolate manufacturer's instructions.
4. Why does my chocolate transfer design stay on the sheet?
The chocolate may not have set completely, may be out of temper, or may have been applied at an unsuitable temperature. Allow the chocolate to firm up fully before carefully peeling away the backing.
5. Can I use dark chocolate with edible transfer sheets?
Yes, but the colors may appear duller than they do on white chocolate. Some shades may also be less visible. White chocolate is generally recommended when you want better color visibility.
6. How long should I wait before peeling a chocolate transfer sheet?
Wait until the chocolate has fully set and become firm. The setting time depends on the chocolate, thickness, temperature, and working environment. Avoid peeling while the chocolate is still soft.
7. What causes blurry prints on chocolate transfer sheets?
Blurry prints can result from chocolate that is too hot when applied, excessive pressure, or movement while the chocolate is setting. Check the working temperature and spread the chocolate evenly.
8. How should I store unused chocolate transfer sheets?
Store unused sheets in an airtight bag in a cool, dry place. Protect them from moisture, direct sunlight, and excessive heat, and follow the storage instructions provided with the product.
Similar Post:
How to Choose the Best Chocolate Transfer Paper for Your Baking Needs
5 Creative Chocolate Transfer Sheet Ideas for Stunning Desserts
How To Decorate A Cake With Chocolate Transfer Sheets?
Everything You Need To Know To Print on Chocolate Transfer Sheets?