
There is just no excuse for not having a perfect Christmas cookie in hand for everyone. We want a cookie that has a crisp outline and smooth icing on top, shaped like a Christmas star, classic round, Christmas tree, sugarcane, or gingerbread man. You can create all kinds of cookies with just one cookie dough recipe and decorate them like professionals. Icinginks has been in the cake and cookie decorating business for decades and has acquired much experience in different custom desserts. Today, we are sharing our expert tips and tricks for a perfect gingerbread cookie and classic royal icing. Keep reading to know the absolute solution if you have messed the cookies in any way or need a batch of professional-looking cookies at the last minute.
Gingerbread cookies are the golden standard for Christmas cookies. They add the perfect touch of flavors and spices and are favorites for all ages. The best part is that the cookies bake to have a perfectly smooth surface, making the decoration process so much easier. Let’s dig in!
Ingredients For Gingerbread Cookies:
- Brown sugar- ¾ cup or 165grm
- Unsalted room temperature Butter- ¾ cup or 170 grams (If you are using a slightly salted butter, skip adding extra salt)
- Vanilla- 1 tsp
- Molasses- ¾ cup (or, 1 cup dark corn syrup, honey, or maple syrup)
- Salt- ¼ tsp
- Cinnamon Powder- 1 tsp
- Ground ginger- 2 tsp
- Nutmeg- ¼ tsp
- Cloves Powder- ¼ tsp
- Baking soda- 1 tsp
- Flour- 3 cups
- Egg- 1 whole
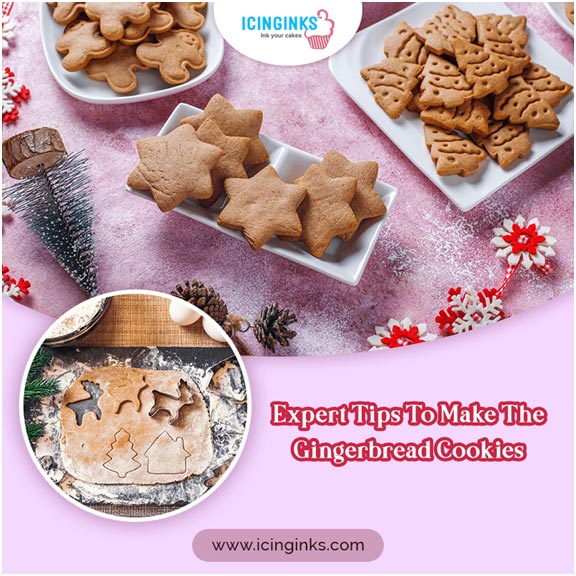
Step-By-Step Guide & Expert Tips To Make The Gingerbread Cookies:
How To Prepare The Cookie Dough?
- Mix all the dry ingredients, using a sifter to avoid any lumps. This step will also help mix the ingredients. Give it a quick whisk and rest aside.
- Work the butter in the mixer until nice and soft. Room temperature butter is important as it makes this step much easier.
- Add in the sugar. You might want to scrape the bowl down. Mix the butter and sugar until smooth and creamy.
- Next, add the Molasses and mix them in well. It is important to add the Molasses in this step as it will be very difficult and messy after you add the eggs.
- Add in the egg and vanilla and keep mixing. If you see the mixture is broken, don't panic! Its a dough, not buttercream.
- Next, add the dry ingredients into the mixture and mix all the ingredients at a slow speed until everything is incorporated.
- Divide the batter into two halves and wrap them with plastic wrap.
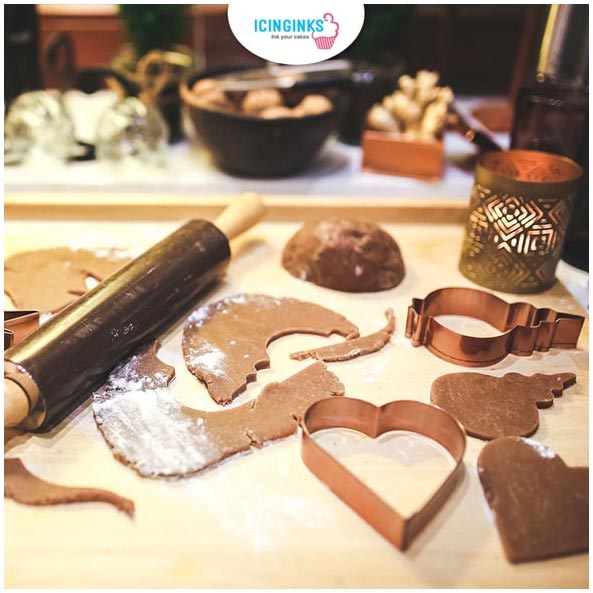
- Roll down the cookie dough with a rolling pin over the wrap roughly to increase the surface area. It helps the dough to chill in the refrigerator better overnight and also to roll the dough later.

How To Bake The Gingerbread Cookies?
- Preheat the oven to 350.
- Get some flour on the work surface and let's get to rolling. Don't skimp on the flour. You are going to need more flour than the other cookies. Also, flour your rolling pin.
- Bring out the dough from the fridge. It should be nice and hard. Don't worry because it will become soft real fast. Your goal is to keep them consistent, soft, not sticky, and not crumbly.
- If it sticks, just add in a little flour while rolling until it looks perfect. However, don't put too much flour or it will affect the taste.
- Roll out the dough to about ¼ inch thickness. Make sure the consistency is even and then cut the cookies with cookie cutters. You can use as many shapes as you want at once.
- Transfer the cookie cut-outs to a baking sheet. Bake your gingerbread cookies for 10 minutes and let them cool. Chill the cookies into the refrigerator overnight, if possible, for best results.
Pro-Tips Of Making The Cookies:
Control the amount of flour while handling the cookie dough. You definitely need enough so that it does stick but also not too much or it will be crumbly. Too much flour will imbalance the entire recipe and taste. If the dough becomes soft and sticky while rolling out, put the dough back into the fridge and let it cool down. If there are any cracks, simply pinch them together and make a consistent dough. The more the dough will be exposed to air the stickier it will become. It's really important to take your time when making the cookies. Too many ingredients can mess up the cookies. Keep things simple and classic recipes can make the most amazing cookies.
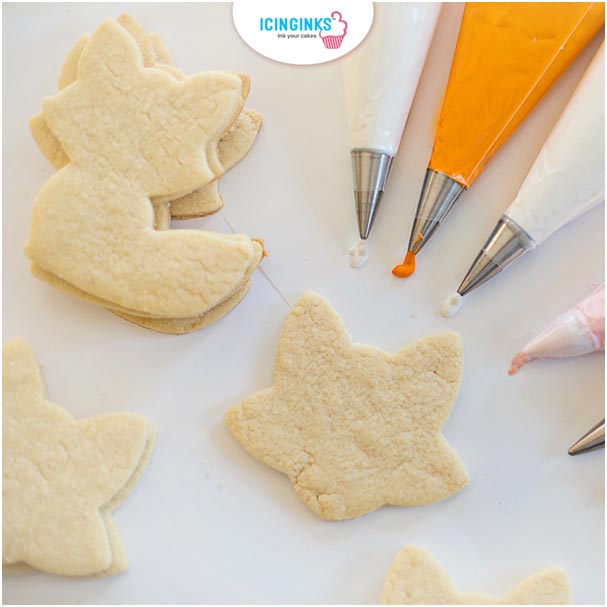
Now that you are all caught up and probably have made a batch of perfectly shaped delicious gingerbread cookies, it's time to decorate. Decorating a cookie may look very difficult for beginners but it's actually rather easy. There are different ways to decorate the cookies but for all the methods and ideas, you need icing first. Royal icing, of course, is the most favorite option.
You need royal icing with a medium consistency that can make a clean outline and a thin royal icing to flood the cookie.
How To Make Royal Icing?
Ingredients:
- 3 egg whites
- Powdered sugar- 1 lb. or 450 grams
- Flavoring (You can use vanilla or, use almond extract for pure white color. Any clear favoring extract works perfectly for a snow-white icing)
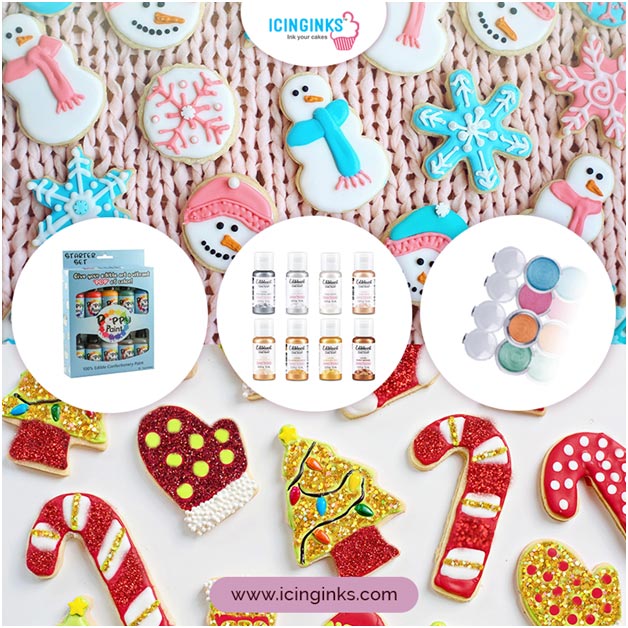
- Food coloring (Poppy Paints or, Edible Art Paints both works perfectly)
Expert Guide To Royal Icing For Cookie Decorations:
- Make sure your mixing bowl is nice and clean
- Whisk the egg whites until white and frothy. Both hand mixers and electric ones work perfectly fine.
- Sieve the confectioner sugar to ensure that there are no lumps.
- Put the sugar in 2-3 portions and let it mix slowly and steadily. Avoid beating too fast or it will incorporate unnecessary air into the icing.
- Keep mixing until it's stiff and glossy and makes a peak.
- Divide the icing for different colors into different bowls. Use only a drop of edible food paints. Don't beat up the coloring. It's better to mix them with a spatula to avoid incorporating air.
- Cover the icing that you are not using readily with plastic wrap. The icing will dry up really quickly.
- You will need less amount for the outlining than the flooding part. Separate the icing dedicated for flooding the cookies and add a quarter teaspoon of water at a time. You will probably need just 1 teaspoon or 2 for a small bowl of icing, depending on your atmosphere.
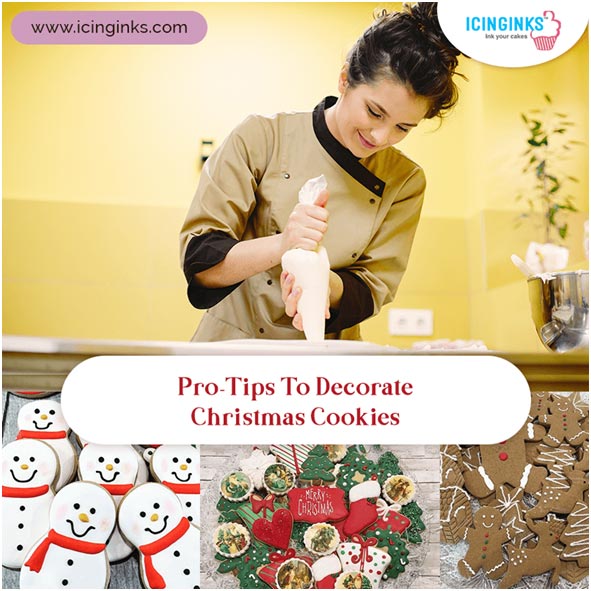
Pro-Tips To Decorate Christmas Cookies:
Here comes the fun part! You can choose to decorate the cookies with different colors of royal icing or decorate them with custom printed images. You may also dust the cookies with edible metallic luster dust for a luxury finish. Let's explore all the options one by one.
Tip 1: For Decorating The Cookies With Colorful Royal Icings
While piping down the icing, don't touch the edge of the tip to the cookie. The icing should just trail down and always keep your icing bag lifted. Hover around the edges to make a clear outline, following the edges. Let it sit and become solid before starting to flood with icing. Don't go crazy with the amount of icing and let it spread in its place. Use a toothpick or pin to fill any gaps. Use piping tips to make things neat.
If things go south, don't panic. Just scrape off the icing and start over. That's the best part of royal icing. No one needs to know the mishaps.
Pipe down one color at a time to avoid any bleeding. Let one color become solid (you should be able to touch on the icing surface) before adding another.
Tip 2: For Decorating The Cookies With Custom Edible Images
Professional bakeries print directly onto the icing with Direct-to-Food Edible Printers. It eliminates the need for edible sheets. However, you can easily decorate the cookies looking the same at home. If you have an edible printer, you must also know how to print edible images. If not, Icinginks offers this really cool service where you can upload any image and well will print that image on any edible sheet of your choice and send it to your doorstep. All our custom edible images or custom frosting sheets are FDA compliant, Kosher, and Vegan. Sugar sheets or frosting sheets work the best for edible images.
Once you have the printed images, peel off the backing and simply put them onto the icing. For this, the icing should not be hard. Do it directly after flooding the cookies for the best results. Maintain a gentle hand while decorating your cookies.

Tip 3: Decorating With Metallic Luster Dust
After completely covering the cookies with the royal icing, let them sit. Make sure the icing has hardened enough to touch. After that you can either sprinkle some edible metallic luster dust on the cookies, decorate with a paintbrush or even use them using airbrush gun and stencils.

What If You Don't Have Time To Make The Cookies?
Now, as promised, here’s the ultimate backup plan if you want to avoid all the work and still want professional-looking custom cookies. If you want to flaunt your own brand without actually spending so much time in the kitchen we have a solution. If it's the last moment and you don't have all the ingredients at home, or have no time to run a test batch, contact Icinginks. We are offering our expert services to provide custom printed cookies at your doorstep. All you need to do is to choose the size and shape of the cookies, upload the image you want, and press the order button. We are offering custom-decorated sugar cookies for all occasions. Order Now