Your search for an edible image printing service online comes to an end with Icinginks Edible Designing Software. It’s a browser-based software so you do not need any kind of software installation. Just with an active Internet connection, you can access it anywhere, anytime with your browser. Currently, it’s supported on Google Chrome browser only.
Here are steps to use this software to create custom printed edible cake toppers or edible pictures for cakes.
#1. Log in to your Icinginks Edible Designing Software
Open Google Chrome and enter https://www.icinginks.com/edible-designing/ in the URL address bar. Using a valid credential – email ID and order ID – you can log in to access the amazing image editing and designing tools of this edible printing software.
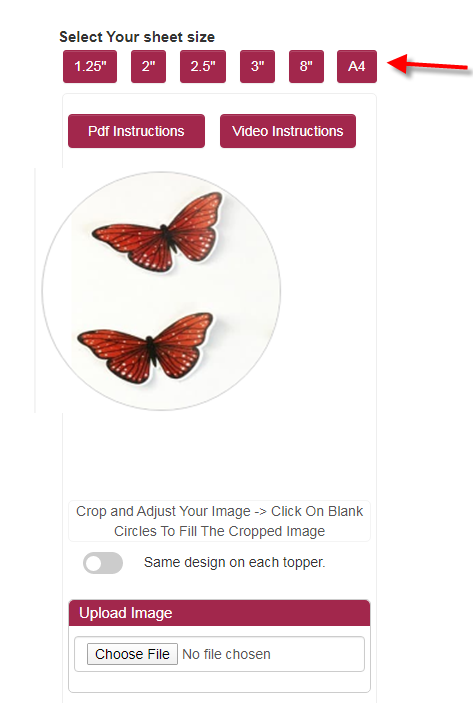
#2. Select Your Sheet Size
Navigate to the “Select Your Sheet Size” section. Select the appropriate sheet-size from the available circular (1.25", 2", 2.5", 3", 8") and rectangular (A4) options. The selected option gets displayed on the right side.
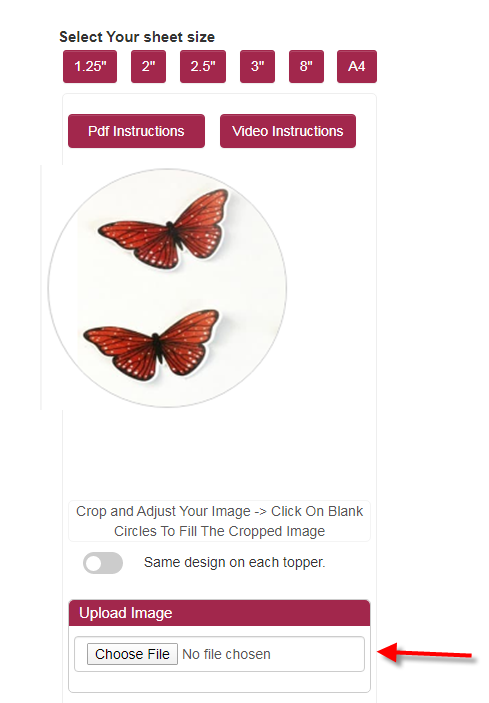
#3. Upload Image
Scroll down a bit to reach the “Upload Image” section. Click the “Choose File” button below it to upload the desired image. Crop and adjust your image. Get it into the right orientation with easy-to-use resizing tool.
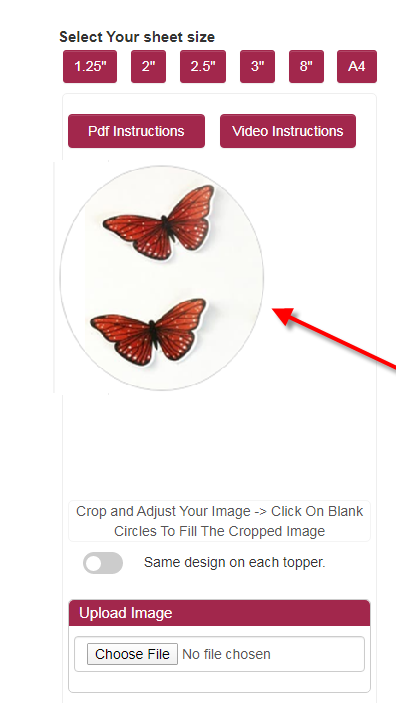
#4. Applying the Image in the Selected Shapes
Apply the design to the shapes present in the right-hand side. Click on the shape, and you will get the image copied there. You can apply the customized image to all the shapes or selected ones based on your requirement. There is a toggle button. Slide it left or right. By default, it stays in the left, which means the customized image will be copied to all the shapes available. Drag it to the right, if you want to fill only selected shapes with the image.
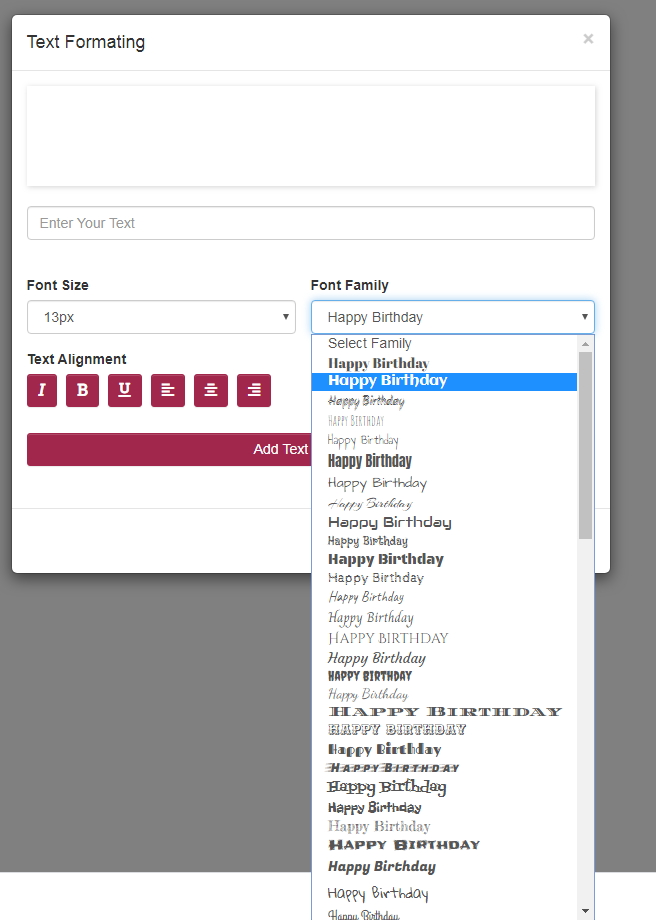
#5. Add Your Text Message
You can add a message to your custom edible prints with the right formatting. Click “Text Formatting” to get access to a Text Formatting window. Type your message in the text-field provided on the top. Choose the right Font Family, Font Size, Text Alignment (Italic, Bold, Underline, Left, Center, Right justification), and Text Color. You can see the preview of your message above the text-field in the wide-open area. Once your customization is over, click “Add Text to Sheet”, and close the window. The message gets applied to all the shapes.

#6. More Personalization and Formatting
You can remove outline from the shapes with a single mouse-click on “Remove Outline”. Stickers enhance the design. Click “Stickers-Clip Art”. Select the right option from the available categories of sticker. There are around 20 options to choose from.
#7. Take a Print
Once your desired picture is ready, you can print it out using an edible printer connected to your PC. Make sure your printer has the right settings and the cartridge has the right ink.

Stay in Control
This online edible paper printing service from Icinginks lets you control every aspect of customization and design. If you need to change your image, or apply a different text formatting, different sticker, and so on, you can do it effortlessly without wasting your edible sheets. Click on the “Delete” icon adjacent to the “Images” option.
Note: A PDF instructions sheet and video tutorial are linked with this web-based custom edible printing services, which registered users can access for free once the logged in to the software.