Whether it’s your birthday, anniversary or any other important event, there is always a huge nostalgia that is attached towards such events. To take such an event towards to the next level and make it very special, you surely need a cake that is both unique and personalized. This can be done using an edible printer that can print edible images on edible frosting sheets. It is often said that baking is useless without the art of representation. Frostings to cakes are similar to symphonies & metaphors to poems; they are like Jules to cakes as they greatly enhance their beauty. There is a lot of craze for photos on cakes and this craze is increasing with every passing second. Edible frostings are the true form of printable art and a great enhancer for your creative skills and passion for baking, use them to create custom art on cakes and cookies, make them your canvas and use the printer as your brush. 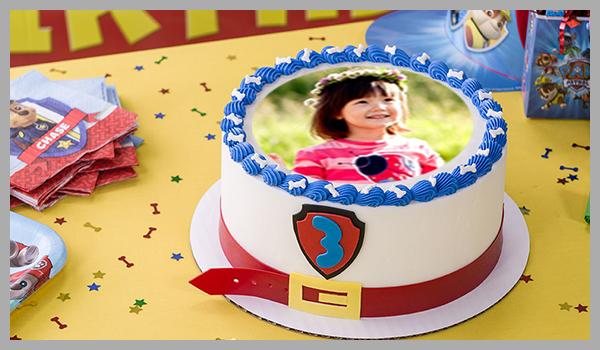
If you know how to bake, then you only need to know the edible printing process and equipment’s required. The first and foremost requirement for edible printing is an edible printer, and from an ocean full of edible printers out there in the market only specially tweaked edible printers from Canon and Epson are good for edible printing process, then the second requirement is edible cartridges, edible cartridge is very similar to regular cartridges with the only difference being the use of edible ink in place of regular ink. The ink used in a regular printer is full of gluten, arsenic and other heavy metals that are carcinogenic in nature, so they are far away from being suitable for eating purpose. Icinginks edible ink used in edible cartridges is Kosher made from food coloring. Our edible ink cartridges contain ingredients which are FDA compliant for consumption and eating purpose. 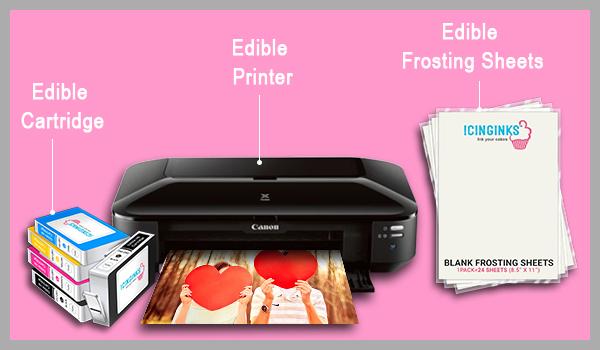
Lastly, you need edible frosting sheets those are mainly made from rice, potato, glycerine, and other starches, use them with your edible printers for printing any edible image of your choice. The edible printing process is very easy, just like a regular printing. Place an icing sheet in the printer just like you place a regular paper in the printer and then press ctrl + p or give a command to print to begin the edible printing process to begin.
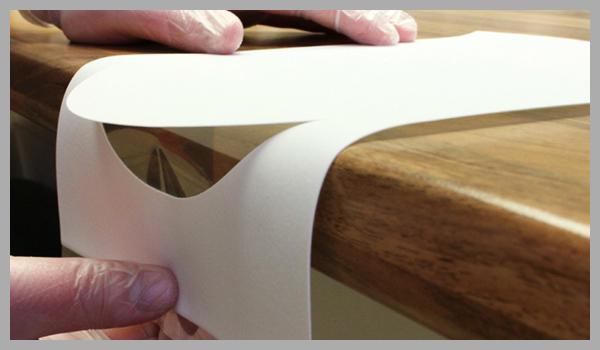
Do not remove the plastic baking prior to printing. Place the frosting sheet into the printer with the frosting side up. Once the sheet is printed keep that at room temperature to dry for 5-15 minutes. a.) Bake your cakes, cupcakes or pie and allow it to cool. Smoothen the surface of your cake; Peel off the transparent film from the backside of the sugar sheet. b.) To release the image from the baking sheet, simply hold the corners (image facing up) and roll across the sharp edge of a table top, slowly working in from all sides toward the centre. c.) When the image is placed onto the iced cake, ensure the icing is still moist or sticky. It is this moisture in the icing that will ensure the image blends with the cake. Gently smooth image on to the cake surface with your hand to remove air bubbles. 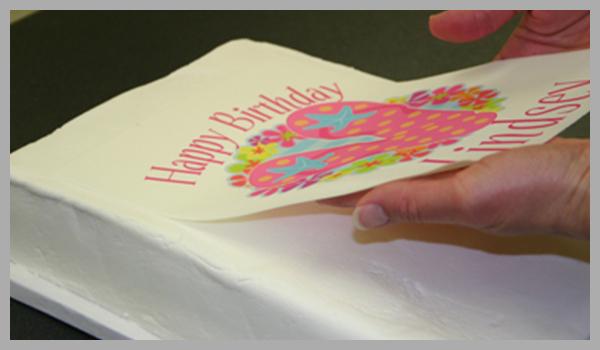
For best results, it is ideal if the top of the cake is relatively smooth. Below are the methods to remove baking sheets easily – a) Use a blower type Hair dryer (or any other hot air supply) on the reverse side of the baking sheet on high hot for 30-40 seconds. After heating the baking sheet, let it cool down before attempting to remove the icing sheet. (The cooling process allows the icing sheet to stiffen)This method is very reliable and should solve your release problems. b) Place in a warm dry oven at a low temperature, for about 1-2 minutes, or lay the sheet on a warm pan for a minute or two. As in the previous method, let the baking sheet cool down before attempting to remove the icing sheet. 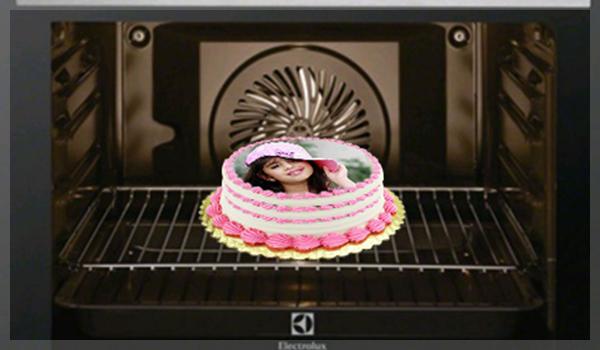
After you have the required image of your choice, printed on edible frosting sheet then the only step left is to put it on the cake and then the moisture from the icing dissolves the paper, causing the image to sink into the frosting and that all, you are good to go and your cake is ready to be eaten, similarly just place the printed frosting sheets on your cookies and let them magically settle on top of your cookies. The best way to bind printed frosting sheets or wafer paper on cookies is by using corn syrup or edible gel as well.